Autumn and Halloween Mini-Bunting Tutorial
I'm looking forward to the weekend as I'll ~again~ be spending time with other crafty souls at The Peacock Cafe! This time we'll be making autumn/Halloween mini-bunting for gifts and home or holiday decor:
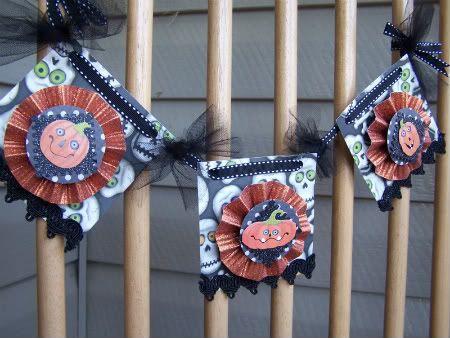
Jacks and Skulls (sounds like Jackson Skulls, doesn't it?)...
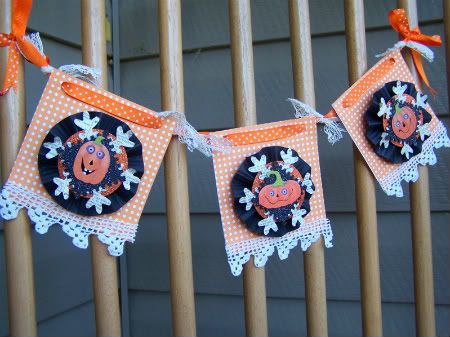
Country Pumpkin (soooo much nicer than "Country Bumpkin!")...
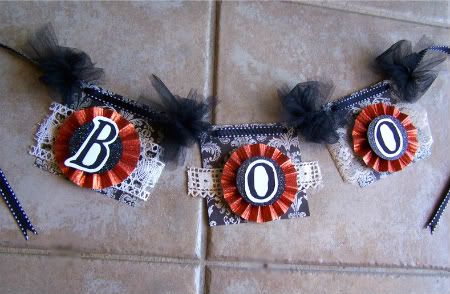
The Tatty Boo Bunting (using lace and trim remnants on these has been FUN!)...
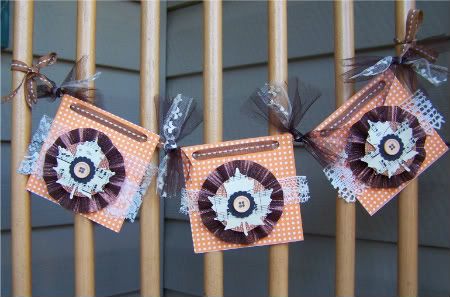
... and a much less spooky yet fabulous-for-fall Autumn Song Bunting (the leaves have been cut from music pages).
Several friends and friendly strangers have purchased kits from me, but will be unable to attend tomorrow's class, which means it's time for...
A PHOTO TUTORIAL (insert dramatically happy music here)!
This post will be photo-heavy, which I'm hoping will be more helpful than tedious. I'll be creating more autumn and holiday kits that I'll list in my Etsy shop, but they will not match the ones in this post. Their style and assembly steps will match, making this an easy tutorial to bookmark for a later date.
All printed-design papers, cardstock, ribbon, tulle and buttons were purchased at well-known crafts stores. The paper, vintage text, lace, and trim remnants were found or gifted, which is why the kits are limited. Three cheers for breathing new life into older crafty materials!
*****
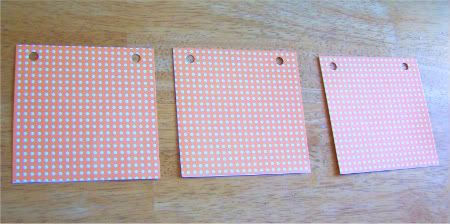
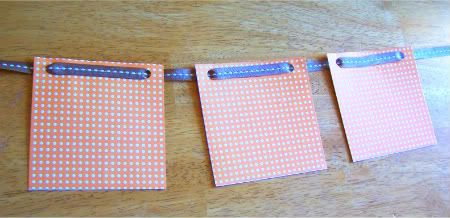
Start by laying out the three square panels, and make sure the holes are positioned at the top of the bunting:
Lace your ribbon through the holes, being careful not to pull too hard. While cardstock is pretty sturdy, layered paper is less so.
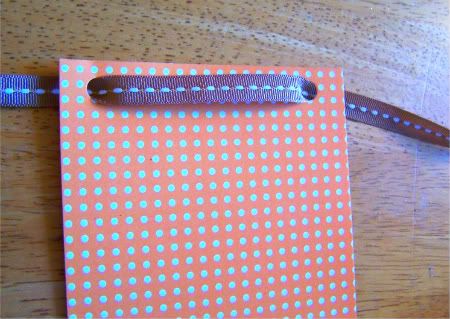
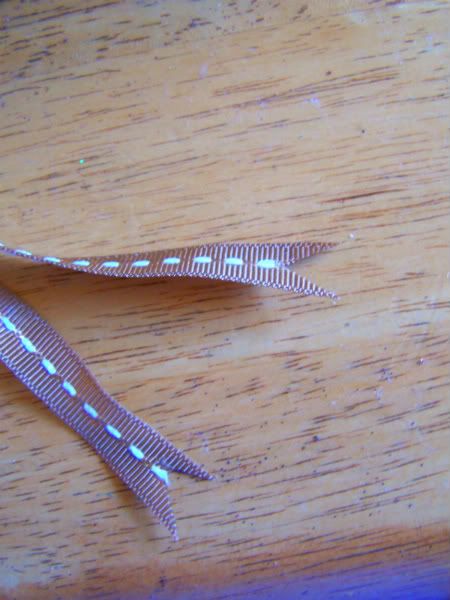
For this pattern, I've laced the ribbon beginning UNDER the panel, then up and OVER the front surface, diving back down under, but you ~could~ lace it the other way, which would create this:
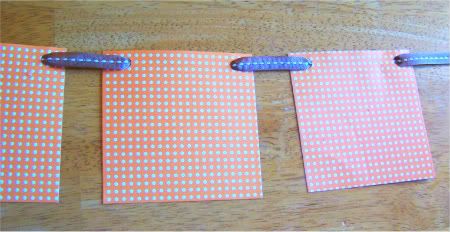
A peek at the panels laced the way I prefer them:
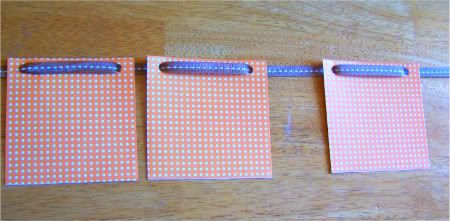
They slide quite a bit, so make sure that the center panel is positioned at the mid-point of the ribbon, and space the other two panels an equal distance from it. The extra ribbon should be equal lengths on either side for tying.
Make sure your panels have an inch or inch-and-a-half of ribbon between them (you need the space for the tulle and lace ties):
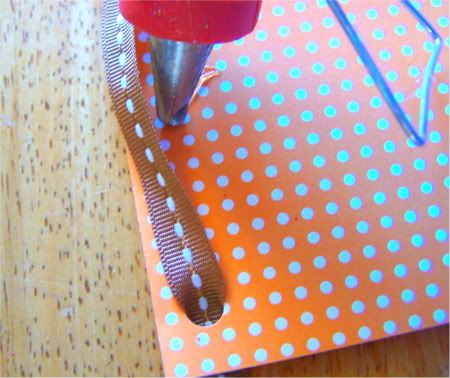
To keep the panels from sliding, use glue or hot glue on the underside of the ribbon and press the ribbon against the paper, OR after positioning the panels, gently lift up the ribbon and add a dollop of hot glue where the ribbon will fall, gently pressing the ribbon into the glue and smoothing it out (it might try to adhere in a wiggly fashion, so work fast):
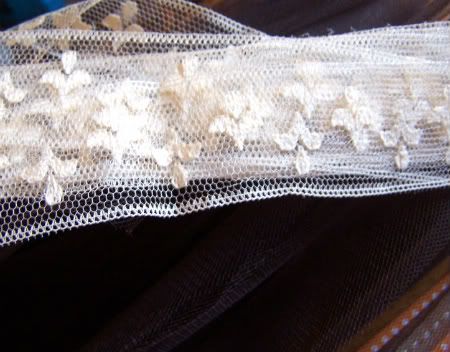
Find your three pieces of mis-matched lace or trim, and place one on each panel, running horizontally along the middle of each square:
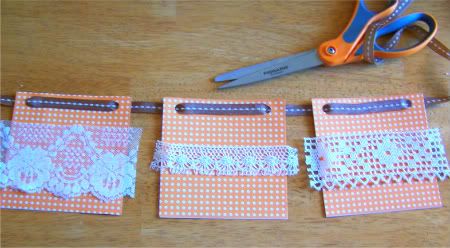
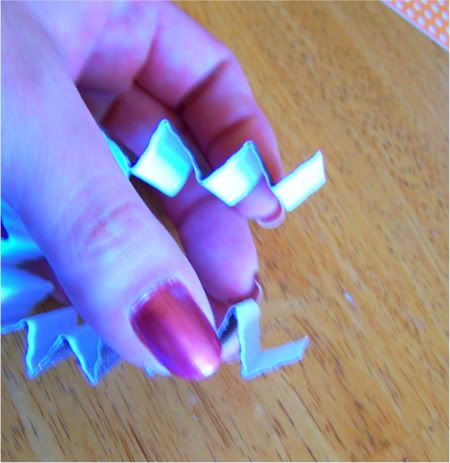
Glue your lace pieces down, trim the edges if necessary (I like a bit of overhang) and find your long strips of cardstock. Fold them accordion style (like a paper fan, back/forth/back/forth):
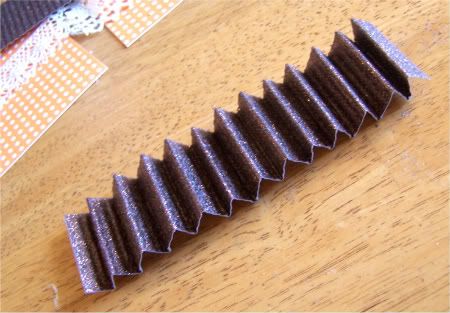
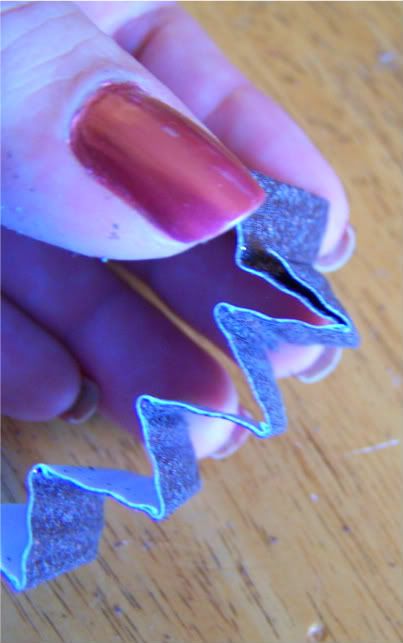
Make sure both ends of the strip end with folds facing the same direction:
Glue one end over the other to form a ring:
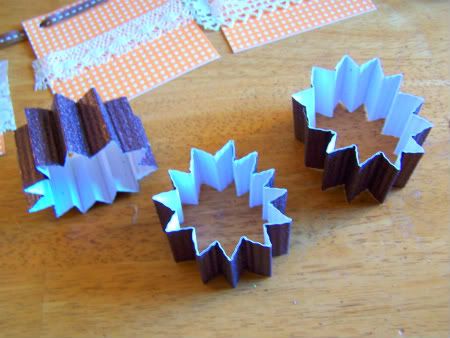
You'll have three rings with which to form center medallions:
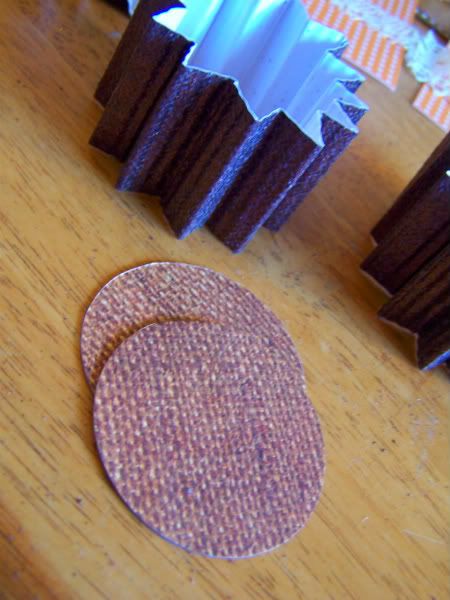
Make sure you have your large paper circles handy (you'll need six, one for the top of each medallion and one for the back):
Take a ring and press it down:
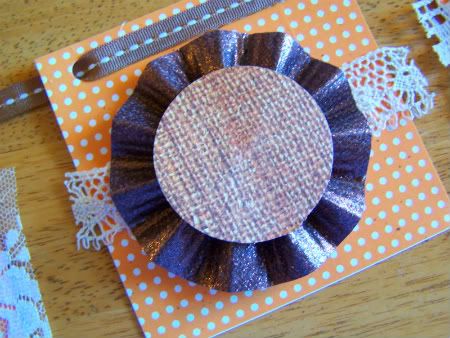
When flat, add hot glue to the center and top it with a large circle. You'll need to hold the medallion flat as the glue cools and hardens. Once cool, flip the medallion over, add glue to the center, and use another large circle as the backer:
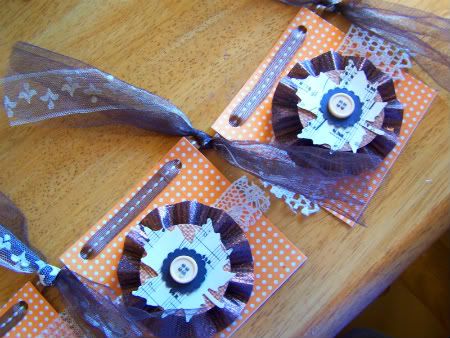
When all three medallions are cool, glue them to the middle of each square panel:
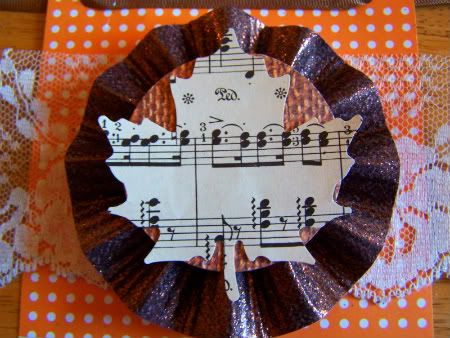
Organize your leaf cut-outs, smaller round circles, and buttons. You'll layer them on top of each accordion-folded medallion:
Use hot glue to add the leaf:
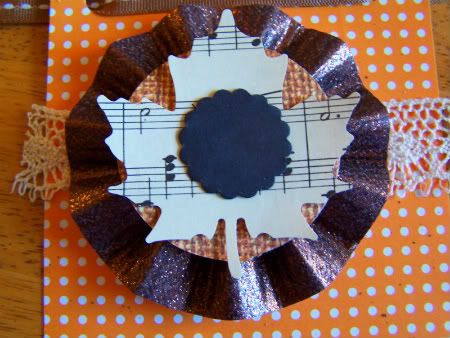
...and the smaller circle:
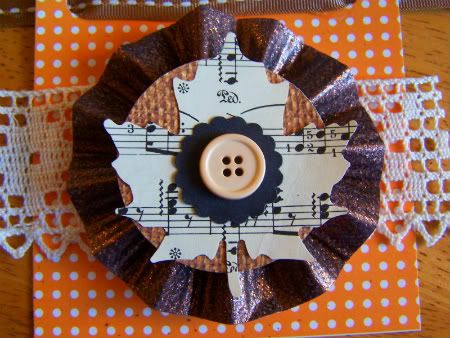
...and the button:
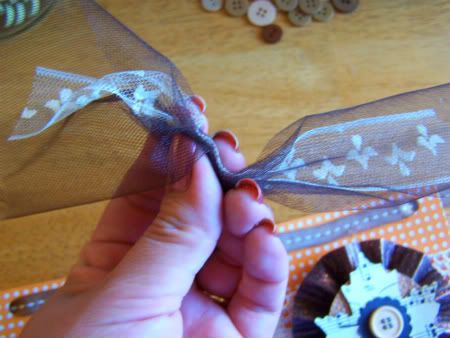
Separate the tulle and lace strands:
Tuck one strip of lace into a single width of tulle, pinching it together, and tie it with a knot around the exposed ribbon:
Trim the ends of the ties using pinking shears or scissors, depending on which gives you the finished edges you like:

Gently pull apart the tulle and lace, "fluffing" it a bit:
Cut dovetails into both ends of the tying ribbon:
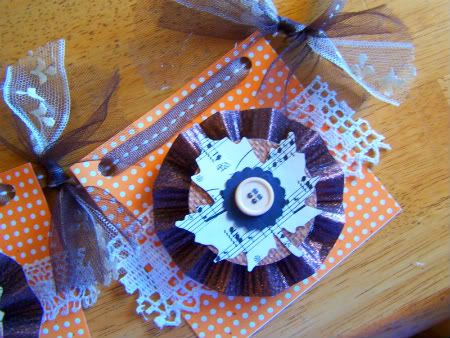
And **whew**, after you've folded, glued, layered, tied and snipped, you're ready to display your mini-bunting:
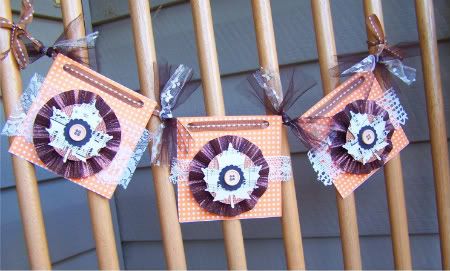
FABulous!
*****
Other three-panel mini-bunting kits follow the same steps for assembly; only the items "layered" or lace/trim locations change a bit. Take a close look at the product photo(s) to see how each is completed.

Jacks and Skulls (sounds like Jackson Skulls, doesn't it?)...

Country Pumpkin (soooo much nicer than "Country Bumpkin!")...

The Tatty Boo Bunting (using lace and trim remnants on these has been FUN!)...

... and a much less spooky yet fabulous-for-fall Autumn Song Bunting (the leaves have been cut from music pages).
Several friends and friendly strangers have purchased kits from me, but will be unable to attend tomorrow's class, which means it's time for...
A PHOTO TUTORIAL (insert dramatically happy music here)!
This post will be photo-heavy, which I'm hoping will be more helpful than tedious. I'll be creating more autumn and holiday kits that I'll list in my Etsy shop, but they will not match the ones in this post. Their style and assembly steps will match, making this an easy tutorial to bookmark for a later date.
All printed-design papers, cardstock, ribbon, tulle and buttons were purchased at well-known crafts stores. The paper, vintage text, lace, and trim remnants were found or gifted, which is why the kits are limited. Three cheers for breathing new life into older crafty materials!
*****
Start by laying out the three square panels, and make sure the holes are positioned at the top of the bunting:

Lace your ribbon through the holes, being careful not to pull too hard. While cardstock is pretty sturdy, layered paper is less so.

For this pattern, I've laced the ribbon beginning UNDER the panel, then up and OVER the front surface, diving back down under, but you ~could~ lace it the other way, which would create this:

A peek at the panels laced the way I prefer them:

They slide quite a bit, so make sure that the center panel is positioned at the mid-point of the ribbon, and space the other two panels an equal distance from it. The extra ribbon should be equal lengths on either side for tying.
Make sure your panels have an inch or inch-and-a-half of ribbon between them (you need the space for the tulle and lace ties):

To keep the panels from sliding, use glue or hot glue on the underside of the ribbon and press the ribbon against the paper, OR after positioning the panels, gently lift up the ribbon and add a dollop of hot glue where the ribbon will fall, gently pressing the ribbon into the glue and smoothing it out (it might try to adhere in a wiggly fashion, so work fast):

Find your three pieces of mis-matched lace or trim, and place one on each panel, running horizontally along the middle of each square:

Glue your lace pieces down, trim the edges if necessary (I like a bit of overhang) and find your long strips of cardstock. Fold them accordion style (like a paper fan, back/forth/back/forth):

Make sure both ends of the strip end with folds facing the same direction:

Glue one end over the other to form a ring:

You'll have three rings with which to form center medallions:

Make sure you have your large paper circles handy (you'll need six, one for the top of each medallion and one for the back):

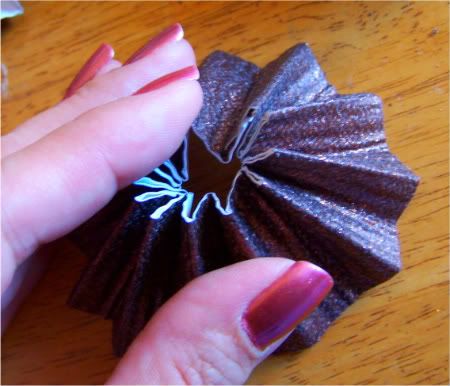
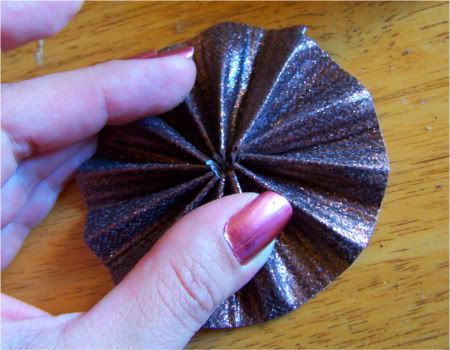
Take a ring and press it down:

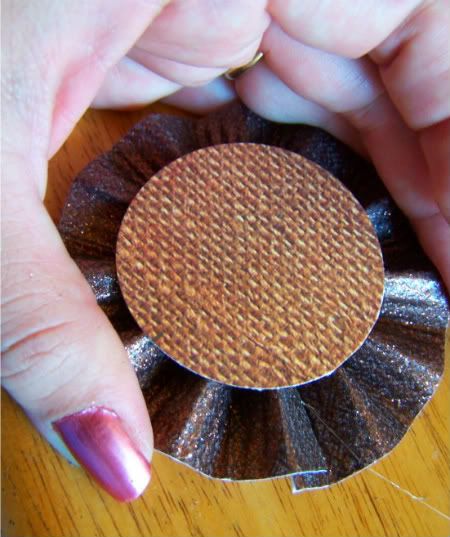
When flat, add hot glue to the center and top it with a large circle. You'll need to hold the medallion flat as the glue cools and hardens. Once cool, flip the medallion over, add glue to the center, and use another large circle as the backer:


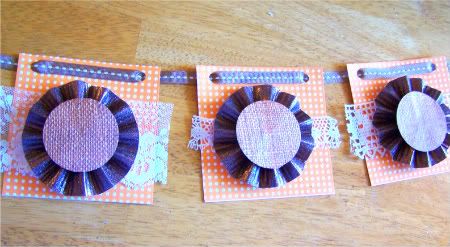
When all three medallions are cool, glue them to the middle of each square panel:

Organize your leaf cut-outs, smaller round circles, and buttons. You'll layer them on top of each accordion-folded medallion:

Use hot glue to add the leaf:

...and the smaller circle:

...and the button:

Separate the tulle and lace strands:

Tuck one strip of lace into a single width of tulle, pinching it together, and tie it with a knot around the exposed ribbon:


Trim the ends of the ties using pinking shears or scissors, depending on which gives you the finished edges you like:

Gently pull apart the tulle and lace, "fluffing" it a bit:

Cut dovetails into both ends of the tying ribbon:

And **whew**, after you've folded, glued, layered, tied and snipped, you're ready to display your mini-bunting:

FABulous!
*****
Other three-panel mini-bunting kits follow the same steps for assembly; only the items "layered" or lace/trim locations change a bit. Take a close look at the product photo(s) to see how each is completed.


What an awesome tutorial! Thank you!
ReplyDelete